Category Archives: Gifts From The Heart

How to Make Cream Cheese

Just takes 20 minutes!

4 cups whole milk (not low fat)
2-3 tablespoons lemon juice
1/4 – 1/2 teaspoon salt

Instructions

  • Heat milk at medium to high in a saucepan. Stir constantly to a rolling simmer. Reduce heat.
  • Add lemon juice 1 tablespoon at a time in 1-minute intervals while stirring.
  • Stir constantly until the mixture curdles and the mixture separates completely. There will be a greenish liquid on the bottom and thick curdles at the top.
  • Remove from the heat.

Lay a sieve with cheesecloth over a large bowl. Pour the curd mixture into the sieve. Let it strain and cool for about 15 minutes.
Transfer curds to a blender and process for about 3-4 minutes until curds become smooth and creamy. Add salt to taste. Add herbs, garlic or any other flavors to taste.

  • This cream cheese must be stored in the fridge. Best if used within 7 days. Use within 2 weeks.

Related:

Indoor Gardening

Dwarf Cavendish Banana Plant

GROWING AND STORING FRESH PRODUCE

Lavender As A Crop

How to Make Soap

How to Make Essential Oils

GIFTS FROM THE HEART – SCENTED CANDLES

GIFTS FROM THE HEART – TEA BAGS

GIFTS FROM THE HEART – PERSONALIZED MOUSE PADS

Gifts From The Heart – Personalized Mouse Pads

Did you know you can buy Mouse Pads, blank in bulk to customize for gifts?

All you need is a color printer, an iron and photo transfer paper to create customized homemade gifts from the heart!

Using your favorite photo or graphics program (can be as simple as Microsoft Paint!) set up the page size to match the size of the mouse pad.

For regular sized Mouse Pads , you can fit one design per 8 1/2 x 11 sheet.

Open your picture or image, add text if desired.

Extend the edges of your design 1/4 of an inch beyond the edges of the design to allow for trimming.

Flip your image or reverse image to a mirror view. This is especially important if your design contains text.

Print a test image on plain paper.

If satisfied with your design and how it prints, load a sheet of transfer paper in the printer. Choose the Best Quality or High Resolution DPI setting in your printer setup.

Make sure the printer is still set to print a mirror image.

Print your design.

Let your transfer paper completely dry.

Using a pencil lightly trace the mouse pad to the back of the transfer paper then trim the excess paper away from the design with scissors.

Preheat your iron on a high cotton no steam setting. Let it get very hot. If the iron isn’t hot enough, your transfer may fail.

Place a cloth on a hard flat surface. Don’t use a padded ironing board. A tile or wood floor or tabletop work great.

Your blank mouse pad should be fabric side UP on your ironing surface.

Place the printed iron on transfer face down on the fabric side of the mouse pad and align it carefully. Place a clothe over the paper and iron the covered paper. Don’t let the iron touch the paper direct.

Iron the transfer in a circular motion. Apply constant steady pressure for one entire minute. Be sure to press down firmly when ironing and pay special attention to the edges of the design.

Let the transfer and mouse pad cool completely for a shiny surface.

Don’t handle it while it is still warm or you will get a flat effect.

After the mouse pad and transfer have cooled, grasp a corner of the transfer paper and peel away from the mouse pad.

You are done!


Related:

Lavender As A Crop (sprigs!)

GIFTS FROM THE HEART – Make Soap

GIFTS FROM THE HEART – Make Essential Oils

GIFTS FROM THE HEART – SCENTED CANDLES

GIFTS FROM THE HEART – TEA BAGS

Gifts From the Heart – Scented Candles

Is the idea of gift giving season creating panic attacks? Relax! You got this!!! Start now and you can have plenty of custom gift bags from the heart ready by the gift giving season! And if you have kids, you will have lots of craft activities to do with them!

Scented Candles

  • +/- 4lbs of wax
  • Essential Oils
  • double boiler
  • thermometer
  • molds, jars, tins, pots, for candles
  • wicks

Melt wax in double boiler . Use the thermometer to ensure the temperature does not exceed 190°F.

Add your Essential Oils to the melted wax while heating/melted. This ensures it combines thoroughly.

Tie an end of the wicks to a pencil to help it hang vertically over the molds you are pouring the wax into.

Cut the wicks from the pencil and let stand for 24 hours.

Related:
How to Make Essential Oils

How to Make Soap

Sachets Sprigs

Related:

Indoor Gardening

Dwarf Cavendish Banana Plant

GROWING AND STORING FRESH PRODUCE

Lavender As A Crop

Make Soap

Make Essential Oils

GIFTS FROM THE HEART – SCENTED CANDLES

————————————————————————–

Gifts From The Heart – Tea Bags

Is the idea of gift giving season creating panic attacks? Relax! You got this!!! Start now and you can have plenty of custom gift bags from the heart ready by the gift giving season! And if you have kids, you will have lots of craft activities to do with them!

Tea Bags

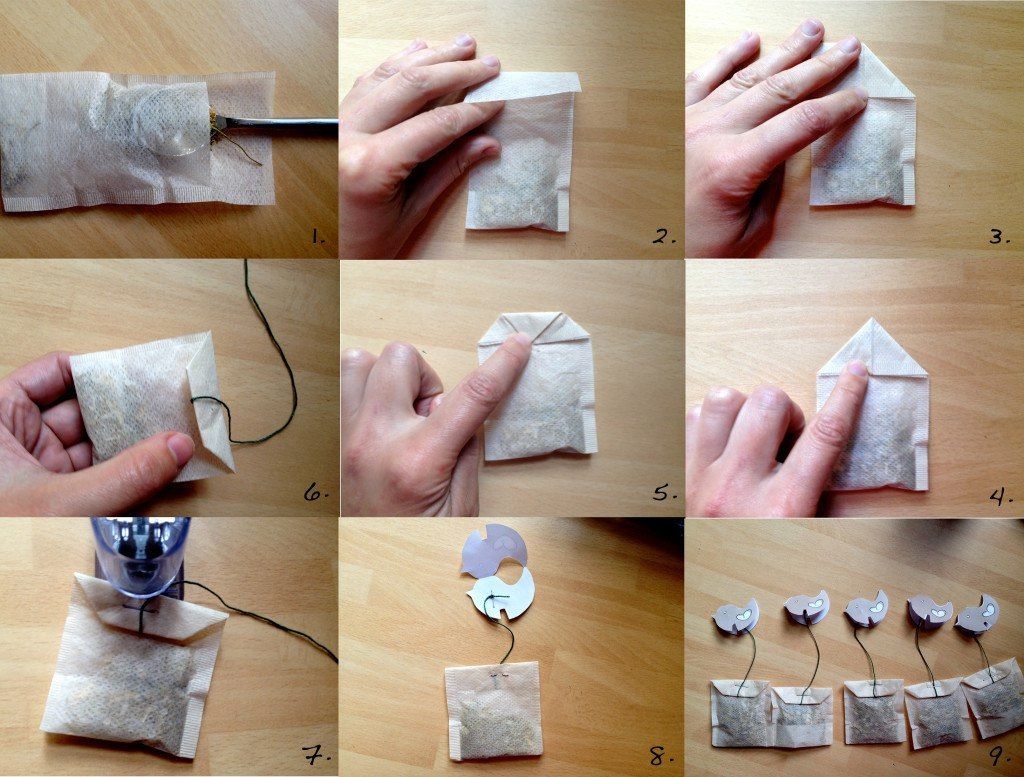
Cut a coffee filter into a rectangle.

Fold the filter into a pocket.

Fill the filter pocket with 2 teaspoons of your herb or spice.

Staple the top closed with your string or thread looped through the staple.

Print custom tags or design your own custom tags. Fold them and glue them with the other end of the string or thread in the middle.

Mix and match tea bags with soaps, oils and sprigs for a pretty gift bag!

Related

How to Make Essential Oils

How to Make Soap

Sachets Sprigs

————————————————————————–

How To Make Essential Oils

Now that I have you all growing plants out of your pots, bowls, baskets and shoes….let’s take a look at how to make them consumable, other than standard food.

Here, I am showing you how to take the essential oils from herbs to make soap. Let’s go over how to make those essential oils.

Even though I am explaining with Lavender, this is the same scenario for other herbs!

Equipment and Ingredients:

  • Flower buds of Lavender Grown organically (w/o pesticides or fertilzers)
  • Cheap vodka or grain alcohol (but do not use isopropyl/rubbing alcohol)
  • I have a mortar and pestle; but a bowl and spoon will work too!
  • Mason jars (you can keep and use glass jars from your sauces, condiments and jellies that you buy in stores)
  • Coffee filters

There are several ways to create a (Lavender) essential oil, tincture or extract at home, from distilling. Producing what is technically a true essential oil is also known as steam distilling. To make an essential oil, you have to distill the Lavender buds, capture the steam, and condense the steam into a liquid. This requires heat, pressure, equipment, skill and patience. And, distillery is where the word “still” comes from—yes, just like moonshiners. 

Place (Lavender) buds into your bowl or mortar, and crush lightly with the pestle or spoon to release the aromatic oil. Don’t make mush!

Transfer the crushed buds to a jar with a tight-fitting lid. Cover entirely with the grain alcohol or vodka. Shake the jar to release more oil, several times a day, for several days in a row. A longer steep means more intense extraction.

After a week or so of this, you’re ready to refine. Use a coffee filter and strain the liquid and into a second jar. (The pour-off is technically lavender-infused vodka, I don’t recommend drinking it.)

Loosely tie off a coffee filter over the open mouth of the jar you just filtered the liquid into; but don’t put a lid on it. You want air to flow through the jar and allow excess alcohol to evaporate from the oil. Let this stand for about a week.

Now, depending on what you are using this oil for; you may want to strain it one more time through a coffee filter to remove any remaining sediment. Other than that, you can store it for your upcoming crafting, baking, making needs!


Related:

Indoor Gardening

Dwarf Cavendish Banana Plant

GROWING AND STORING FRESH PRODUCE

Lavender As A Crop

How to Make Soap

How to Make Essential Oils

GIFTS FROM THE HEART – SCENTED CANDLES

GIFTS FROM THE HEART – TEA BAGS

GIFTS FROM THE HEART – PERSONALIZED MOUSE PADS

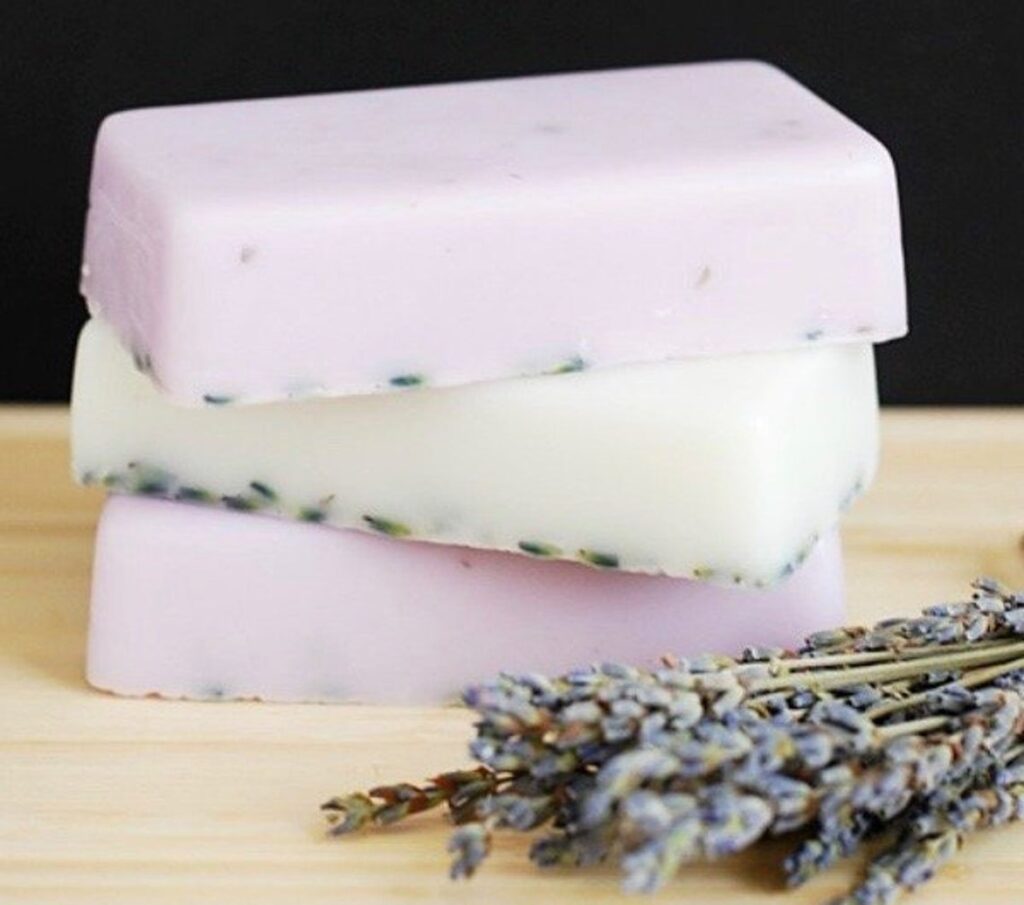
How To Make Soap

Making your own soap has several benefits. Saves money, it’s healthier and you can make money as a product for a side business.

The equipment needed is minimal. More than likely, you already own most of it!

Equipment: Double boiler* (pots* of different sizes can be substituted if a true double boiler is not owned), glass measuring cup, candy or meat thermometer, glass dish, whisk, gloves, goggles, mask and molds for the soap shapes.

*NOTE: Always use stainless steel pots when working with lye. Lye reacts with aluminum and produces toxic fumes*

Ingredients: 2 pounds lard (animal or plant based), 10.5 ounces water, 4.25 ounces lye (Sodium Hydroxide)* , Oils of choice for scent (Lavender recommended solely by preference!), herbs such as ground turmeric (type of ginger) for health benefits.

*NOTE: The gloves, goggles and mask are for working with the lye (sodium hydroxide). It is an inorganic compound commonly found in drain cleaners like Draino. It is caustic and can burn your skin. The mixture will also create fumes. Sounds intimidating; but, the basic safety tips are easy once you do it by the second time!

Instructions:

  1. If you’re using a glass or wooden mold, line it with wax paper.
  2. Put on your protective gear. Pour water into the jar until it reads 10.5 ounces. Then set aside.
  3. Carefully pour 4.25 ounces of lye into the glass dish.
  4. Put your goggles, mask and gloves on now. Carefully and slowly pour the lye into the water. Stir the mixture until the lye is completely dissolved. As you stir, the mixture will become quite hot so be careful if you need to move it. Let it cool to between 100-120 degrees.
  5. Place the lard in a stainless steel pot and put it on the burner. Heat over medium heat until completely melted. Remove the mixture from the heat and let cool to between 100-120 degrees. Use a candy or meat thermometer to test the temperature every 5-10 minutes until it reaches the desired temperature.
  6. Heat the oils and herbs you choose for your soap, like lavender and turmeric (this is where you can get creative once you have the hang of making soap!) in another pot to warm up while the lye mixture cools.
  7. Slowly pour the lye/water into the oils. Blend in the pot, with a whisk, until it resembles a cake batter (3-5 minutes).
  8. Pour the soap into the molds you have chosen.
  9. Put the mold somewhere warm (like an oven with the light on) and let it sit for 24 hours.
  10. After 24 hours, pop your soap out of the mold and cut if needed. Stand bars up in a dry area with space in between each one to allow for air circulation. Let them sit and harden.
  11. When you’re done (with your gloves still on) rinse any supplies that had lye or soap mixture in them with running water. Pour some vinegar in a sink filled with hot soapy water and wash everything in there, then set aside away from your food prep area to dry. Store all soap making tools in a closet or cabinet away from food making tools.
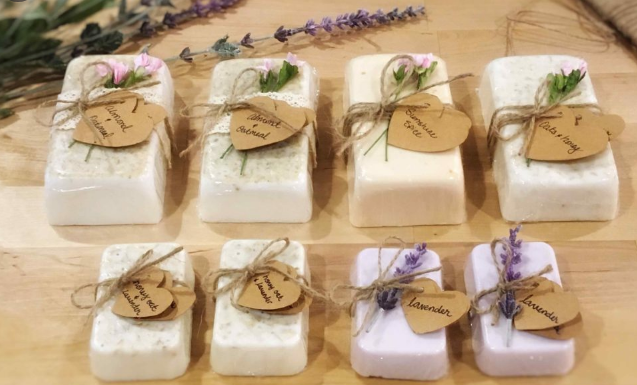
Homemade Soaps!

Now that you have mastered soap making; besides having your own supply, what to do with them all? Gift baskets for the holidays, set up a table in your driveway when there are yard sales on your block, set up a table at Farmer’s Markets, list them on eCommerce sites: Etsy.com, Amazon.com, eBay.com. Launch your own website (don’t know how? I am for hire!)

But now you know you can do it! And you further increased your self sufficiency!

Previous: Indoor Gardening , Growing and Storing Fresh Produce


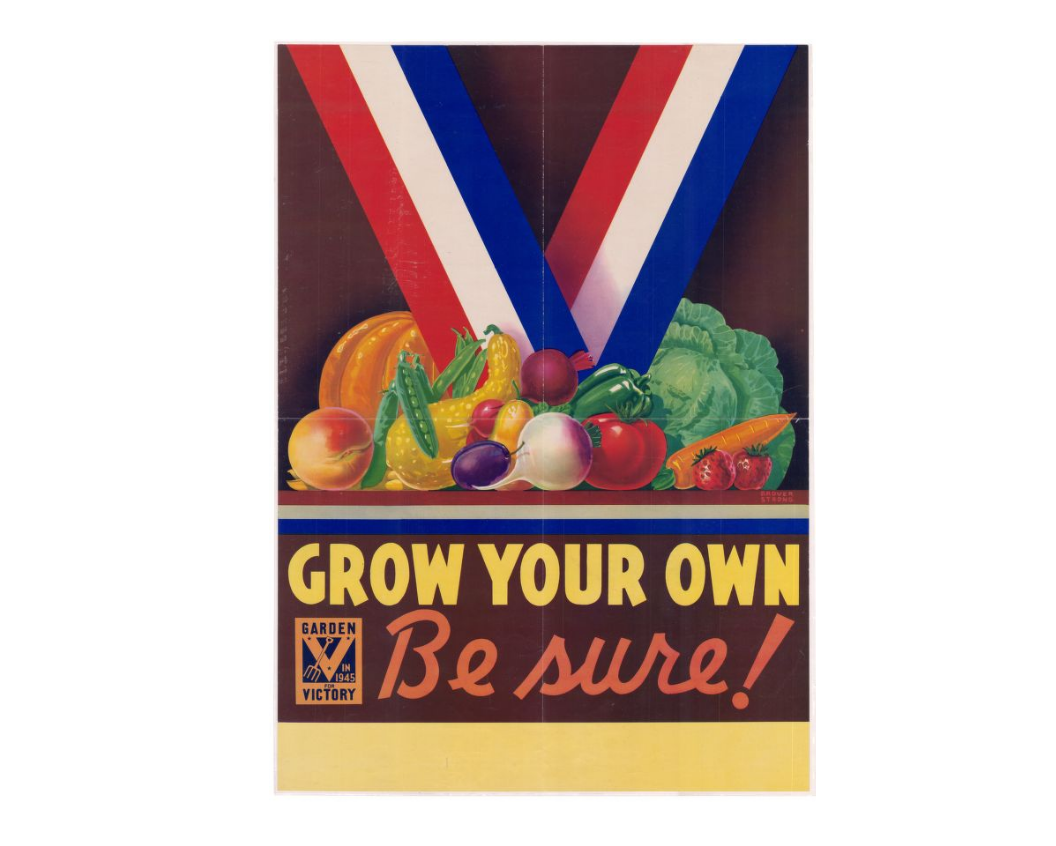
VICTORY GARDENS


Related:

Indoor Gardening

GROWING AND STORING FRESH PRODUCE

Lavender As A Crop

How to Make Soap

How to Make Essential Oils

Lavender as a Crop

Some small growers tend a few dozen plants in their backyard or indoors in buckets, and are happy to make a few hundred dollars.

Larger operations on acreage can bring in hundreds of thousands, especially if they also produce and sell value-added products (soaps, sprigs, oils).

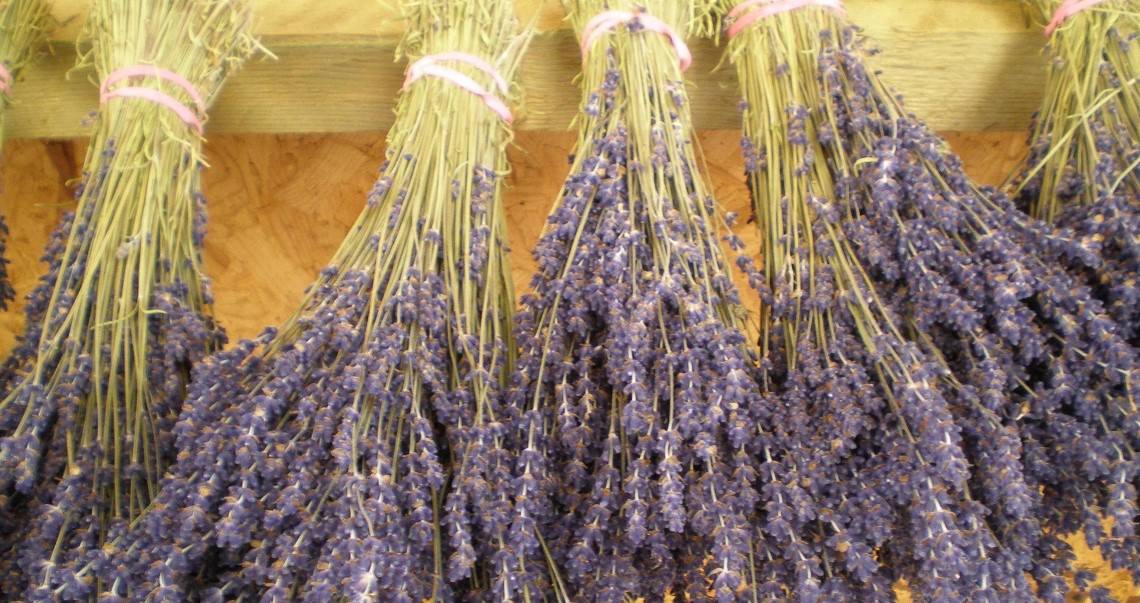
Purple Haze Farms, in Sequim, Washington, for example, routinely grosses over a million dollars a year with about 8 acres of lavender. Fresh lavender bouquets are a very profitable way to sell lavender.

Most growers sell direct to the retail public (craft stores, florists), either from their garden or at the local farmer’s market. At our local Sunday farmer’s market, lavender bunches sell for $6 each. A 20′ x 20′ growing area can produce around 300 bunches each year, worth $1,800.

Larger plots are even more profitable. A quarter-acre can produce about 3,000 bunches, worth $18,000. Unsold lavender bunches can be dried and sold to crafters and florists, who use the bunches for dried floral arrangements.

Also, the flower buds can be removed from the bunches and sold or used to make sachets and other value-added products. Other lavender products, such as lotions, oils and soaps, bring 500% or more markups from the price of the basic ingredients.

Lavender Sprigs

Related:

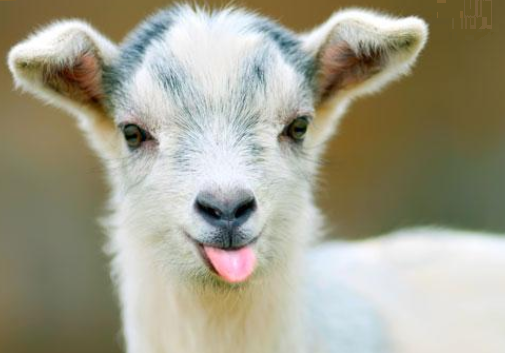
Benefits of Goat’s Milk

How Goat’s Milk Is Healthier Than Cow’s Milk

Based on current research, listed below are some of the differences between goat and cow milk, which make goat milk generally the healthier choice:

– Composition of Fat globules: One of the more significant differences from cow milk is found in the composition and structure of fat in goat milk. The fat globules are 1/5th the size of those in cow’s milk. These smaller sized fat globules provide a better dispersion, and a more homogeneous mixture of fat in the milk

– Higher Amount of shorter-chain fatty acids in the milk fat of goats: Furthermore, glycerol ethers are much higher in goat than in cow milk which appears to be important for the nutrition of the nursing newborn.

– Alkalinity vs. Acidity: The reaction of goat milk is alkaline, the same as Mother’s milk. Cow milk produces an acid reaction. An acid environment promotes the growth of bacteria, fungi, and virus.

– Goat milk protein is more easily digested than cow milk protein:
— The curd in goat milk is small and light, hence easily digested. The curd in cow milk is large and dense. Goat milk is 2% curd (which precipitates in the stomach) as compared with 10% curd in Cow milk.
— This difference in curd tension is attributed to the low levels of alpha-s1-casein in goat milk, compared to cow milk. This is a key reason why goat milk is considered more easily digestible than cow milk.A softer casein curd with smaller flakes could be expected to result in more rapid digestion of milk proteins, and this was confirmed in vitro by Jasinka (1995). Human casein was completely hydrolysed, compared with 96% of goat casein and 76-90% of cow casein. This was attributed to the greater level of betacasein, and lower level of alpha-s1-casein, in human and goat milk casein.These results are not surprising when the impact of alpha-s1-casein is considered on cheese manufacture. A firmer curd is required for cheese manufacture in order to achieve desired consistency and yields, as with cow milk and its high level of alpha-s1-casein.

– Goat Milk Protein reduces the chances of contracting diabetes and other health problems: Goat milk contains A2 Beta-Casein, not the A1 Beta-Casein that cow’s milk contains. Recent research published in February, 2003 has implicated the protein A1 beta-casein as a trigger for Type 1 diabetes and other health issues (Elliott et al, 1999). Commercial efforts are now being made to select and farm cows which only contain A2 beta-casein, which is considered the safe variant of beta-casein. Goat milk only contains the A2 variant of beta-casein, and is therefore a natural choice for those seeking to avoid A1 beta-casein

– Natural Homogenization: Goat milk is already homogenized: The natural homogenization of goat milk is, from a human health standpoint, much better than the mechanically homogenized cow milk product. It appears that when fat globules are forcibly broken up by mechanical means,
it allows an enzyme associated with milk fat, known as xanthine oxidase to become free and penetrate the intestinal wall. Once xanthine oxidase gets through the intestinal wall and into the bloodstream, it is capable of creating scar damage to the heart and arteries, which in turn may stimulate the body to release cholesterol into the blood in an attempt to lay a protective fatty material on the scarred areas. This can lead to arteriosclerosis. It should be noted that this effect is not a problem with natural (unhomogenized) cow milk

– Superior micronutrient absorption compared with cow milk. Aliaga et al (in a study in 2000) compared the influence of goat and cow milk on digestion and utilization of calcium in rats. They found that goat milk enhanced calcium content of femure, sternum and Longissimus dorsi muscle over cow milk. In addition, they found a beneficial effect of goat milk on iron uptake. Similarly, Park et al (1986) showed that anemic rats fed goat milk had higher liver weights and efficiency of hemaglobin regeneration than those given cow milk, consistent with the greater bioavailability of iron in goat milk. Barrionuevo et al (2002) showed that goat milk increased the absorption and utilization of both iron and copper. They suggested that the higher levels of MCT’s (medium chain tricglycerides) in goat milk could account for the improved absorption of iron, and that the higher levels of amino acids cysteine and lysine could also be a factor


Sources:
Bernard Jensen. Goat Milk Magic, 1994.

Vickielynn Haycraft. Goat Milk Nutriton. Real Food Living.com

Aliaga L, Alferez MJM, Barrionuevo M, Lisobnona F and Campos (2000), Influence of goat and cow milk on the digestive and metabolic utilisation of calcium and iron. J Physiol Biochem 56:201-208.

Park YW, Mahoney AW, Hendricks DG (1986), Bioavailability of iron in goat milk compared with cow milk fed to anemic rats. J Dairy Sci 69:2608-2615.

Barrionuevo M, Alferez MJ, Lopez AI, Sanz SM, Campos MS (2002), Beneficial effect of goat milk on nutritive utilization of iron and copper in malabsorption syndrome. J Dairy Sci 85:657-664.
Elliott R et al (1999). Type I (insulin-dependent) diabetes mellitus and cow milk: casein variant consumption. Diabetologia, 42:292-296.

Prosser C et al (2003). Digestion of milk proteins from cow or goat milk infant formula. Abstract and poster paper presented at the New Zealand Pediatric Conference, Queenstown, August 2003.

Bevilacqua C et al (2001). Goats’ milk of defective alpha(s1)-casein genotype decreases intestinal and systemic sensitization to beta-lactoglobulin in guinea pigs. Journal of Dairy Research 68:217-227

Aliaga L, Alferez MJM, Barrionuevo M, Lisobnona F and Campos (2000), Influence of goat and cow milk on the digestive and metabolic utilisation of calcium and iron. J Physiol Biochem 56:201-208

Park YW, Mahoney AW, Hendricks DG (1986), Bioavailability of iron in goat milk compared with cow milk fed to anemic rats. J Dairy Sci 69:2608-2615.

Barrionuevo M, Alferez MJ, Lopez AI, Sanz SM, Campos MS (2002), Beneficial effect of goat milk on nutritive utilization of iron and copper in malabsorption syndrome. J Dairy Sci 85:657-664.